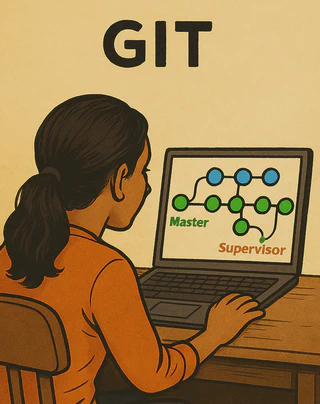
Block 2: Managing projects with Git
Training Scope (4h)
Using Git is essential for modern scientific work because it provides a reliable, transparent, and collaborative way to manage research code, data processing scripts, experiments, and even manuscripts. For doctoral students, Git ensures full traceability of every change, making it easy to reproduce results, compare different versions of an analysis, and avoid accidental data or code loss. It also enables seamless collaboration with supervisors and co-authors, allowing multiple people to work on the same project without conflicts. Beyond version tracking, Git supports open science practices by making it straightforward to publish research code on platforms like GitHub or GitLab, improving the credibility, reproducibility, and long-term impact of scientific work.
Learning Objectives
Understand versioning principles and adopt Git as the central tool for tracking code, data, and research documents.
Disclaimer:
- This course focuses on practical Git usage for researchers. It does not cover advanced Git internals or server administration.
- We will use VS Code’s integrated Git features for ease of use, but command-line equivalents will be provided.
Target Skills
Understand foundational concepts
- What is version control ?
- Local vs remote repositories
- Commits, branches, merges
Master essential Git commands using VS Code
- Initialize a repository
- Stage and commit changes
- Create and switch branches
- Push and pull from remote repositories
Collaborate on a project (GitHub, GitLab)
- Define remotes and clone repositories
- Define working strategies
- handle merge and conflicts
Track a scientific document
- Set up
.gitignorefor research files - Revert to earlier states
- Set up
Notion of advances features
- Tags and releases
- Pull requests
- GitHub/Gitlab CI/CD basics
- Git LFS for large files
Best practices
- Commit message conventions
- Structuring repositories properly
- Branching strategies (main/dev/feature)
- Backup and recovery strategies
Prerequisites, installation and configuration
Prerequisites
IMPORTANT: You need to be administrator on your computer to install Git and to run the configuration commands.
VS Code: Install Visual Studio Code (VS Code) as the IDE (download. Make sure to install the
system installerversion and not theuser installerGitHub account: Create an account on a Git hosting provider (GitHub, GitLab, Bitbucket) In this course, we will use GitHub as the remote hosting provider. If you don’t have an account yet, please sign up at https://github.com/ and follow the instructions provided there.
Installation Instructions
Windows
MacOS
xcode-select --install in the terminal. Alternatively, install Git via Homebrew with brew install git.Linux(Debian based)
Open a terminal and run:
sudo apt update
sudo apt install git
Configuration Steps
Initial Git Setup
In order to set up Git for the first time, you need to configure your user name and email address. Open a terminal (git-bash on Windows) and run the following commands, replacing the placeholders with your actual information:
git config --global user.name "Your Name"
git config --global user.email "my-email@mail.com"
Fill in your GitHub email address to link your commits to your GitHub account.
SSH Key Generation and GitHub Configuration (Optional)
Note: If you use VS Code’s built-in Git authentication, you may skip this step.
If you plan to use SSH for authentication with GitHub (recommended for security and convenience), follow these steps:
Get your public rsa key by running the following command in your terminal (git-bash on Windows):
cat ~/.ssh/id_rsa.pubIf the file does not exist, generate a new SSH key pair with:
ssh-keygen -oFollow the prompts to save the key (default location is fine) and set a passphrase if desired.
Copy the contents of the
id_rsa.pubfile to your clipboard.Go to your GitHub account settings, navigate to “SSH and GPG keys”, and click “New SSH key”. Paste the contents of your public key into the “Key” field and give it a descriptive title.
Click “Add SSH key” to save.
My First Commit
To make your first commit using Git in VS Code, follow these steps:
Open VS Code and navigate to the folder where you want to create your Git repository.
Open the integrated terminal in VS Code (
View>Terminal).Initialize a new Git repository by running:
git initCreate a new file (e.g.,
README.md) and add some content to it.Example: Creating README.md
In the terminal, run:
echo "# My First Git Repository" > README.mdIn the Source Control panel (click the Source Control icon on the left sidebar), you should see the new file listed under “Changes”.
Stage the file by clicking the
+icon next to it or by running:git add README.mdEnter a commit message in the input box at the top of the Source Control panel (e.g., “Initial commit”) and click the checkmark icon to commit the changes, or run:
git commit -m "Initial commit"
Congratulations! You have made your first commit using Git in VS Code.